
DHT11 Temperature and Humidity Sensor - This sensor is an easy way to
detect humidity and temperature around you. In this experiment, we will see
how to interface a 4 pin DHT11 sensor with the Arduino board. In this, we will
not use any external display instead we will be using the in-built serial
monitor to see our output. It is also important to note that we have to import
a DHT11 library in order to use the DHT11 temperature and humidity
sensor.

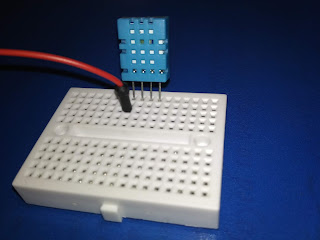
Apparatus Required: DHT11 temperature/humidity sensor, several, connecting wires, breadboard.
Procedure:

Apparatus Required: DHT11 temperature/humidity sensor, several, connecting wires, breadboard.
Procedure:
- First of all download and install the DHT11 library file.
- Install the library on your Arduino IDE.
-
For installation, open Arduino IDE then click on sketch and select add
zip.library then select the location where you have downloaded the zip
file.

-
Connect the DHT11 sensor with the breadboard.

-
Connect the first pin of the DHT11 to 5V of the Arduino board.
-
Now connect the second pin of the DHT11 to analog pin (a0).

- We are not using the third pin of the DHT11 sensor.
-
Now connect the last pin of the DHT11 to the GND of the Arduino.


You may also like:
-
Interfacing IC 74HC595 Shift Register with Arduino Uno
- Interfacing 2 pin Flame sensor with
Arduino Uno
-
Interfacing 4 pin RGB module with Arduino Uno
-
How to use Breadboard Power Supply
-
Interfacing 4 pin HC-SR04 Ultrasonic distance sensor with Arduino
Uno
-
Micro Servo Motor SG90 interfacing with Arduino Uno
-
Interfacing 28BY-48 Stepper Motor with Arduino Uno
-
How to control LED with Potentiometer(variable resistor)
-
How to use Piezo buzzer (Active and Passive) with Arduino Uno
- What is Pulse Width Modulation (PWM) in Arduino?
Arduino Sketch:
#include "dht.h"
#define dhtpin A0
dht DHT;
void setup()
{
Serial.begin(9600);
delay(500);
Serial.println("DHT11 Humidity & temperature
Sensor\n\n");
delay(1000);
}
void loop()
{
DHT.read11(dhtpin);
Serial.print("Current humidity = ");
Serial.print(DHT.humidity);
Serial.print("% ");
Serial.print("temperature = ");
Serial.print(DHT.temperature);
Serial.println("C ");
delay(2000);
}
Thank You!


0 Comments